Quick setup: takes about 3 minutes
Follow the steps below to set up Smart DNS on your TP-Link (or other) router.
DNS address to enter:
146.59.198.179
-
On a connected device, open a browser.
-
Visit one of the following (depending on your router setup, you can find relevant address on the back of your router):
-
Log in using your router username/password.
(Default is usually admin / admin, unless changed.)
-
On the top right, select Advanced.
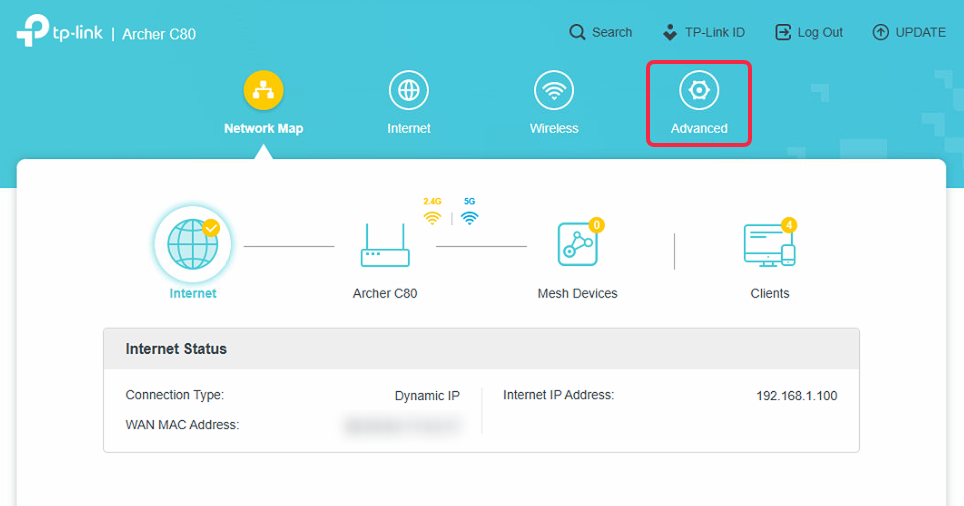
-
Go to Network → DHCP Server.
-
Toggle DHCP Server Enable checkmark.
-
Enter Primary DNS:
146.59.198.179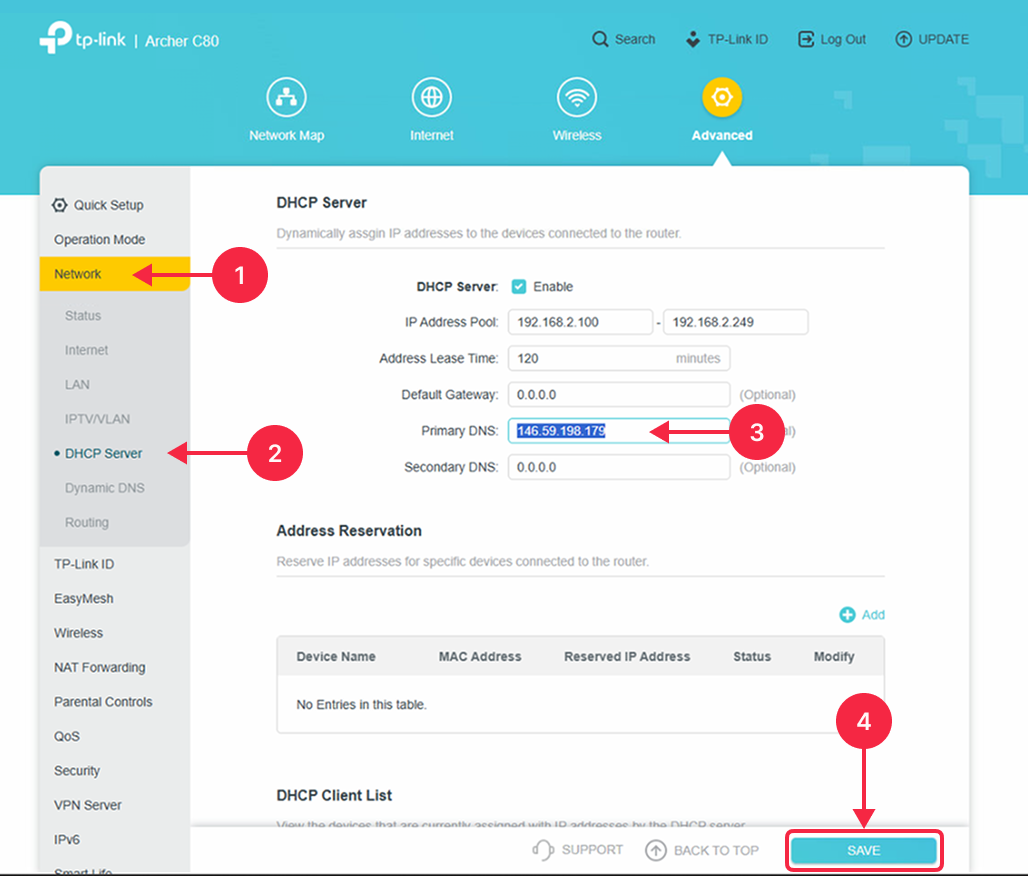
-
Click Save.