You have two ways to set up LivingAbroad.tv DNS on your Apple Tv device:
Setting up using DNS over HTTPS (DoH) profile
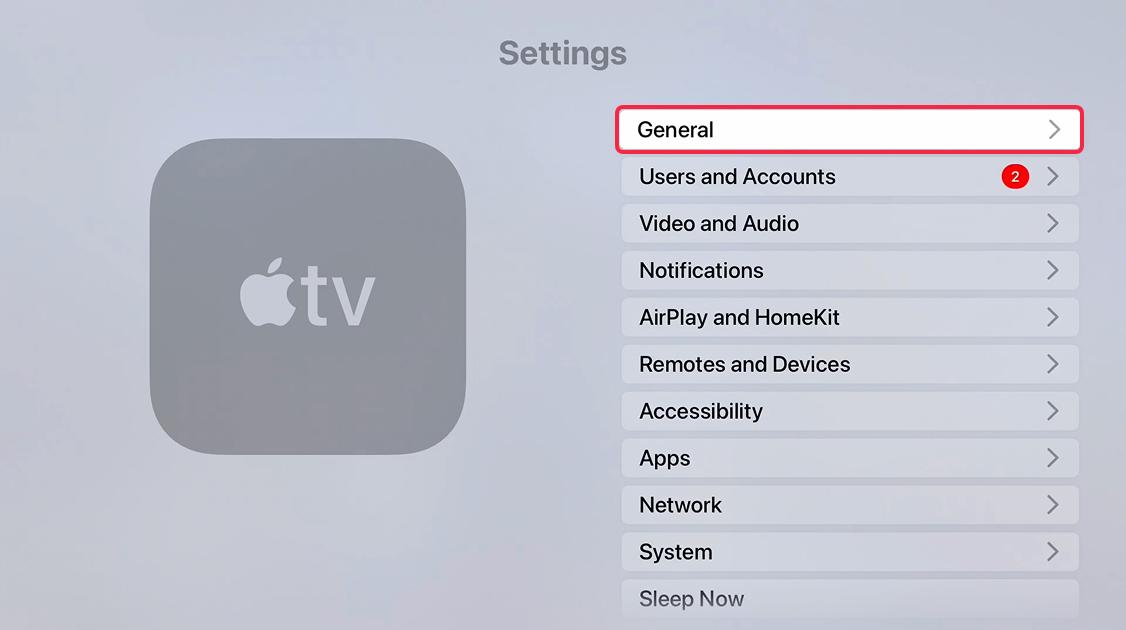
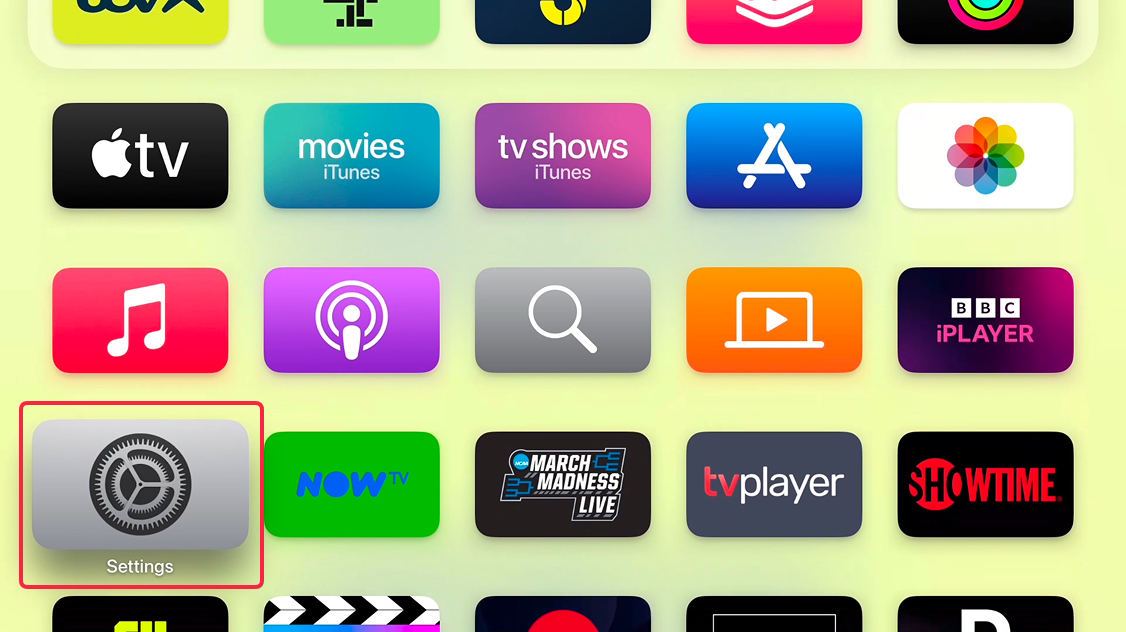
From the main page of the Apple TV device, click on Settings.

Next, choose General and navigate to Privacy and Security.
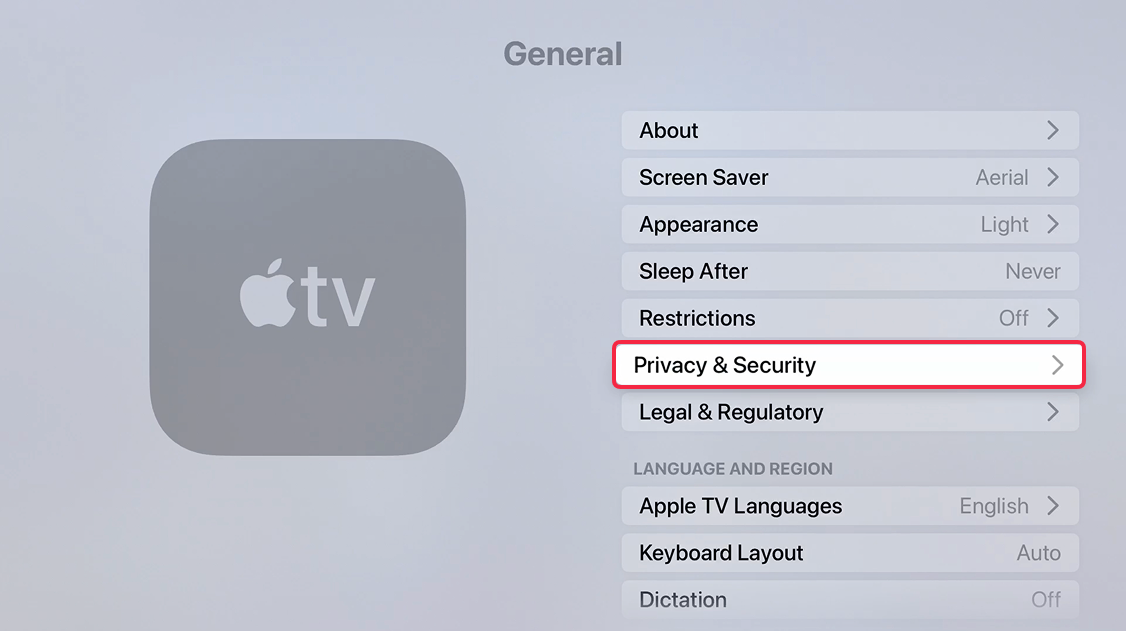
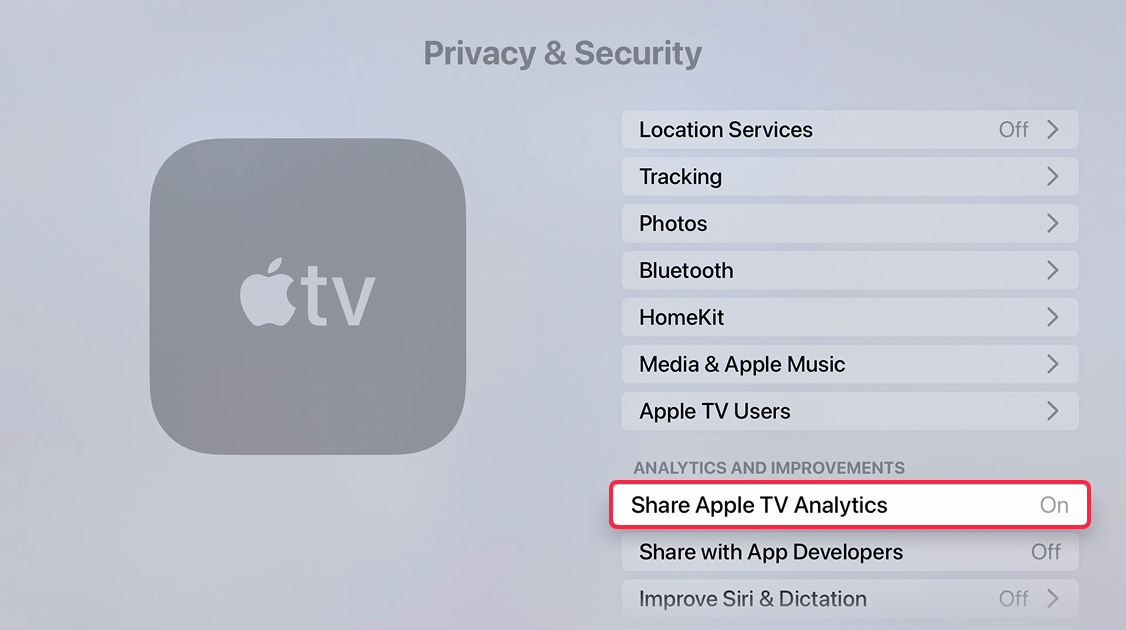
Scroll down to Share Apple TV Analytics. Instead of selecting it, press the Play button on the remote.
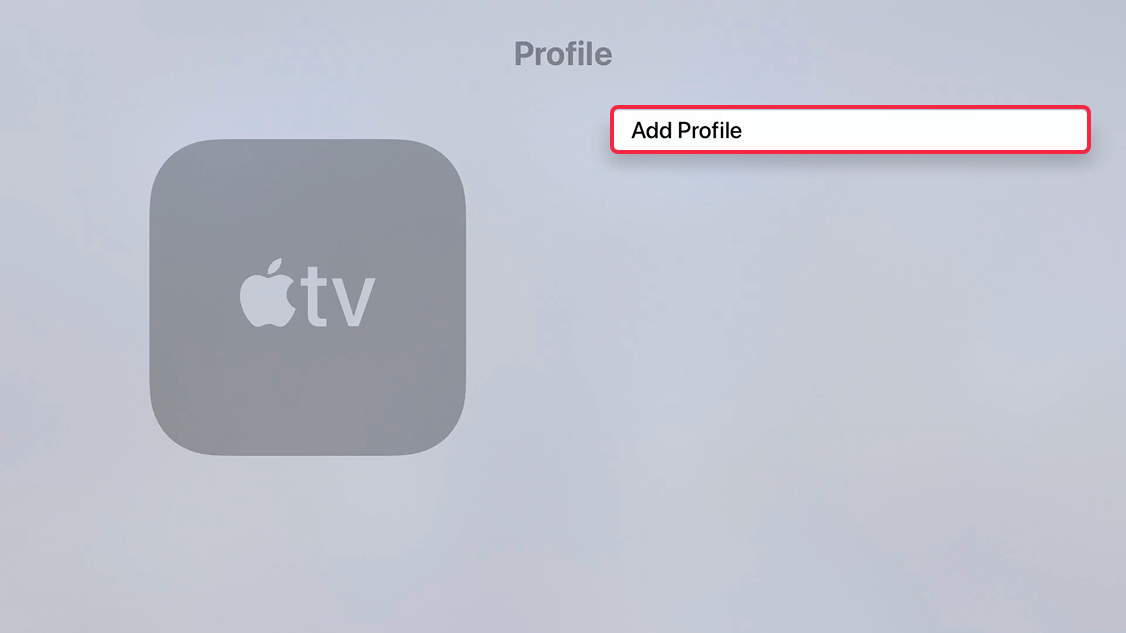
Select Add Profile.
 Enter the configuration file URL:
 https://tinyurl.com/laconfig and select Done.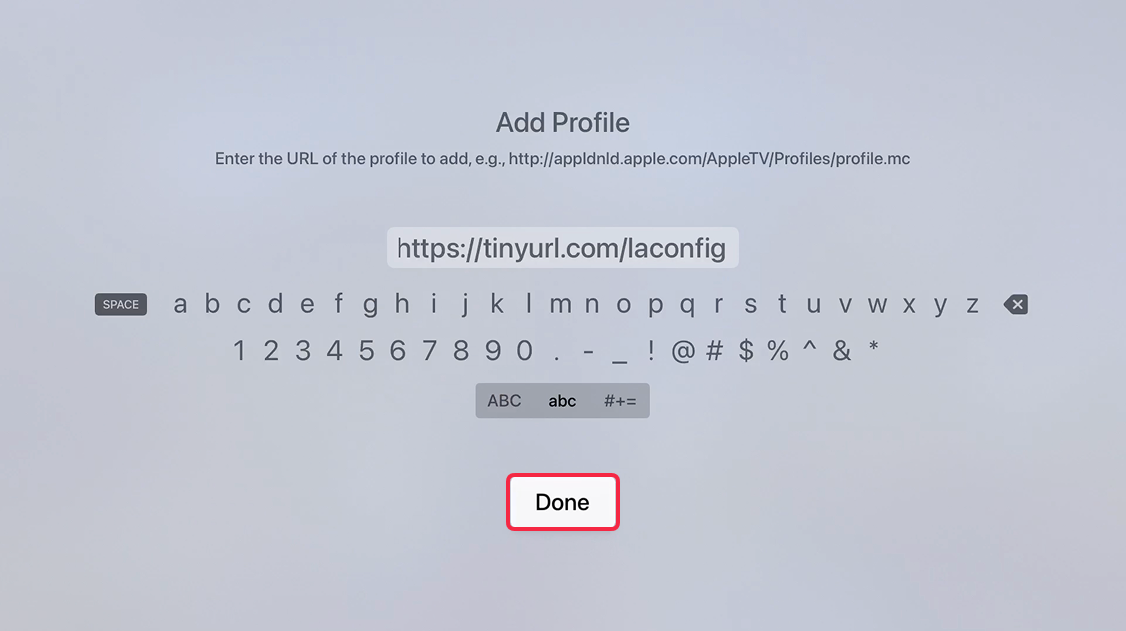
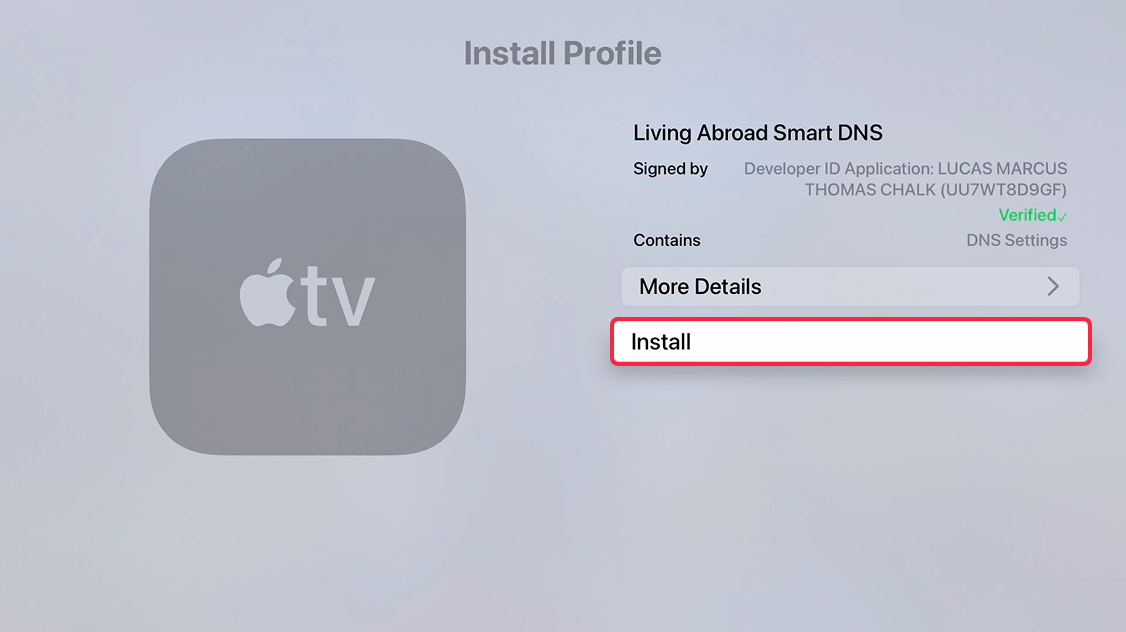
On the next page, Install Profile page, click on Install
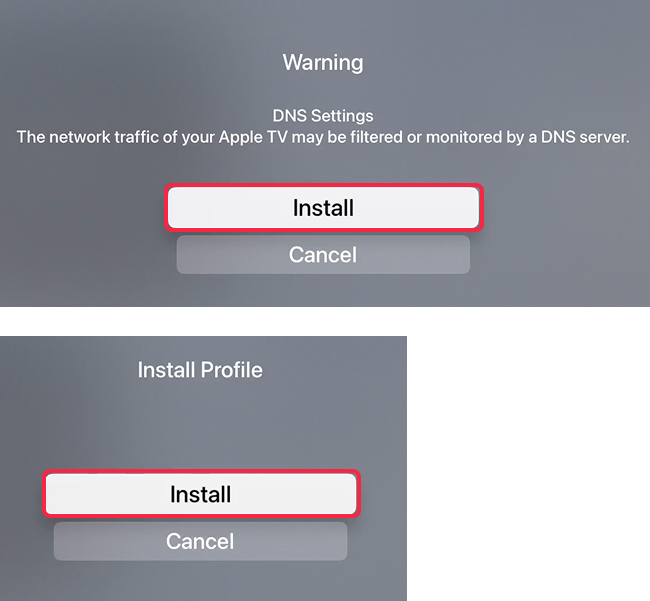
You will be shown a warning screen, press Install. Then Install again on the next screen.
Select Done on the profile page and you are all set! You should see Living Abroad Smart DNS profile, confirming the setup has been successful. 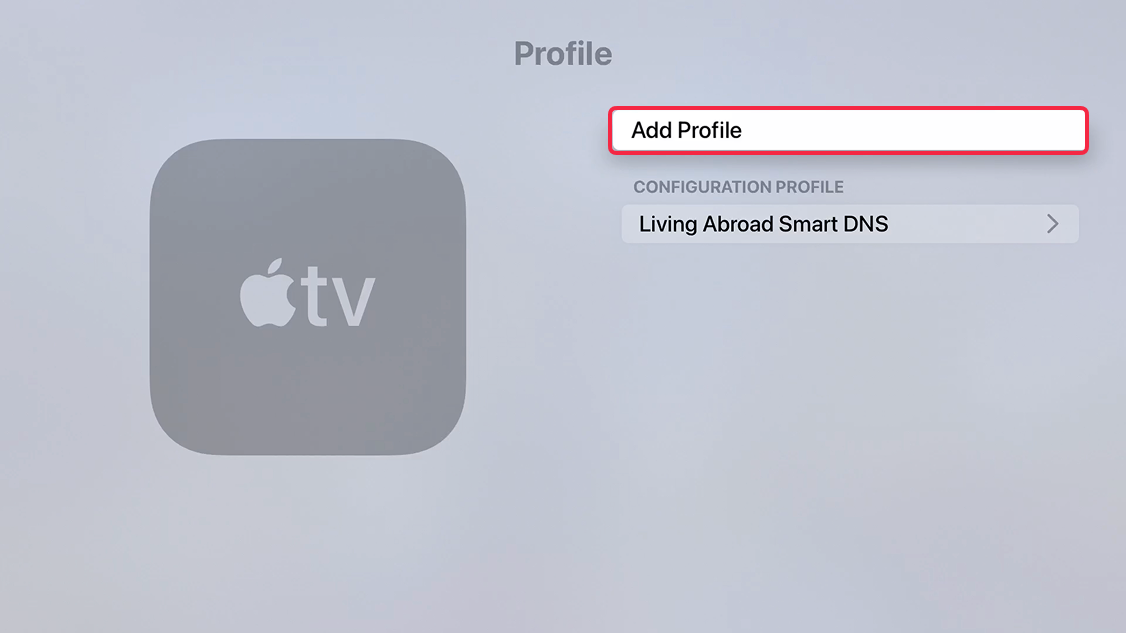
Important! Restart your Apple TV after completing these steps.
Set the DNS address directly on the Apple TV
Navigate to your Apple TV Settings via the Home screen.
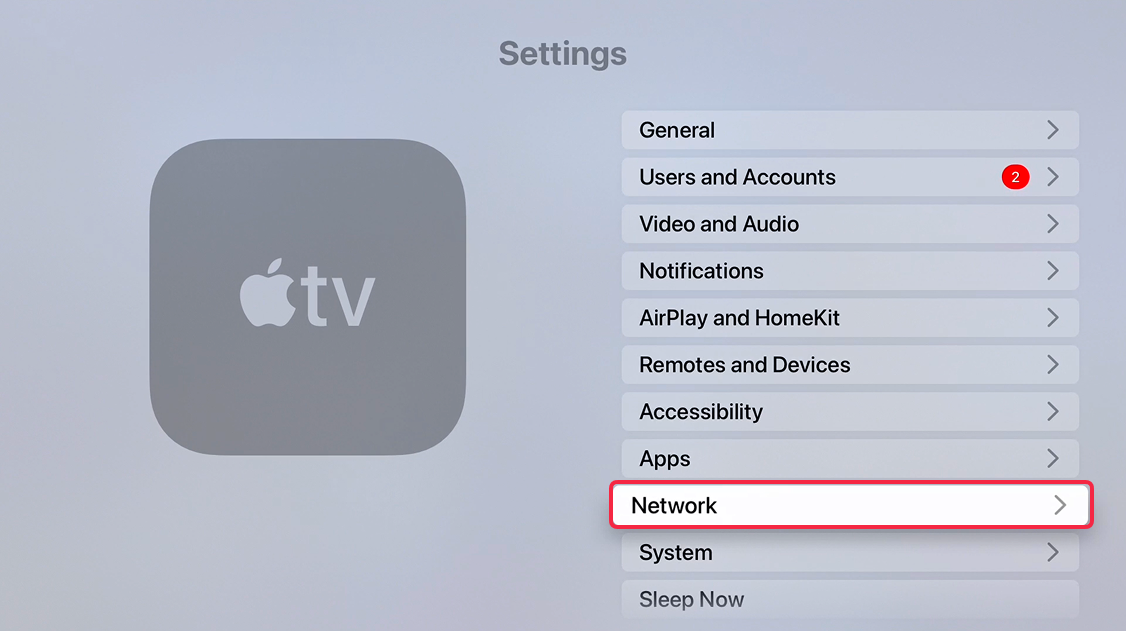
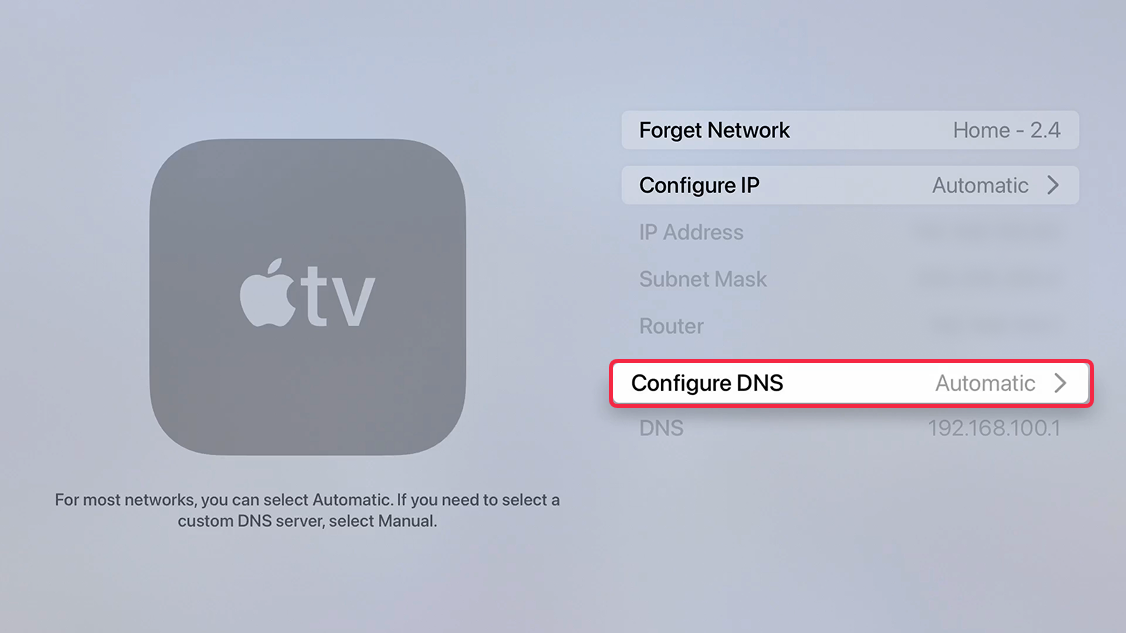
On the Setting screen select Network.
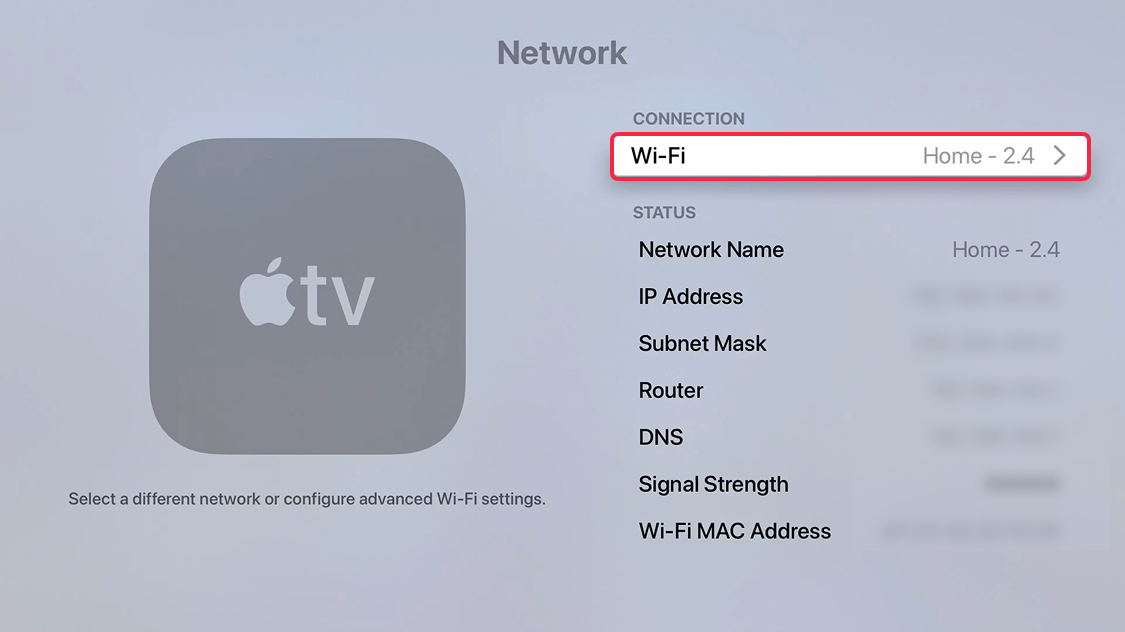
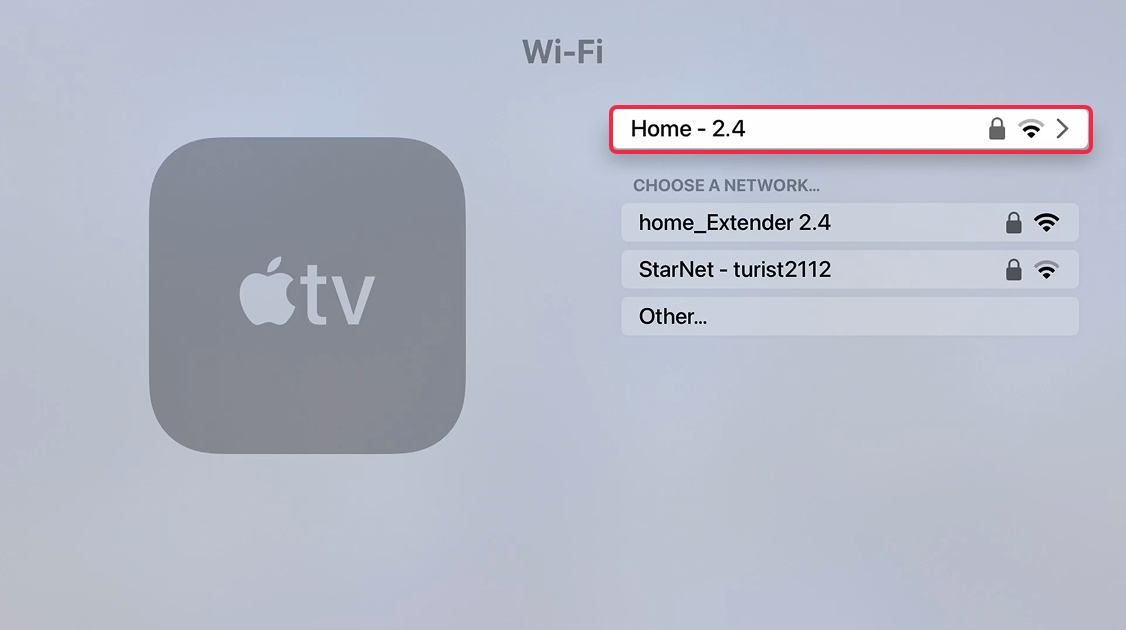
Select your active internet connection: Wi-Fi if you use wireless or Ethernet, if you have a wired connection.
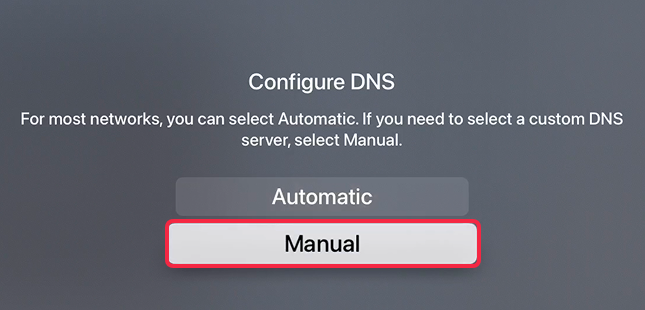
Next, scroll down to Configure DNS and switch it to Manual.
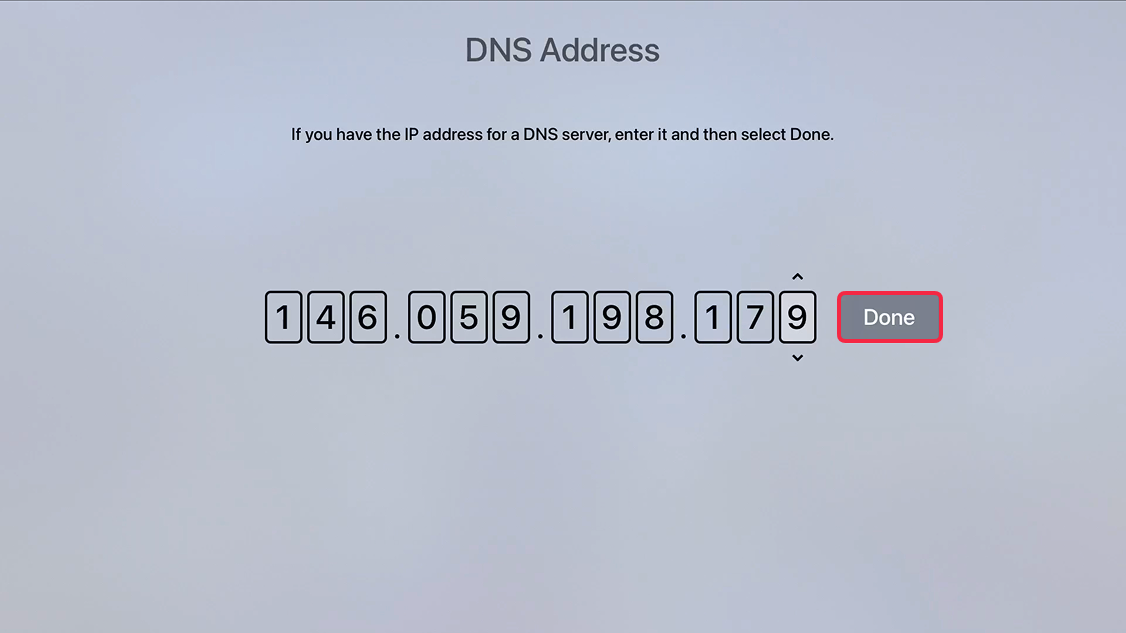
On the next page, enter our Primary DNS address, and then click Done
146.59.198.179
That's it, Smart DNS setup is complete.
Important! Restart your Apple TV after completing these steps.