Quick setup: takes about 2 minutes
There are two ways to set up Smart DNS on your iPhone or iPad. The configuration profile is faster and easier — we recommend it. The manual method is there if you prefer to set things up yourself.
DNS address to use:
146.59.198.179
Method 1: Configuration profile (recommended)
-
On your iPhone or iPad click this link to download our Apple config file for LivingAbroad.tv Smart DNS.
OR scan the QR code using your iOS device:

-
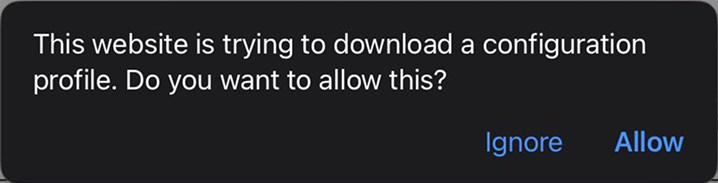
You will be asked to confirm downloading the config profile - Select Allow
-
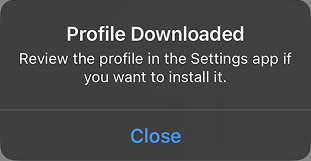
After it is finished, you will be shown this notification to confirm:
-
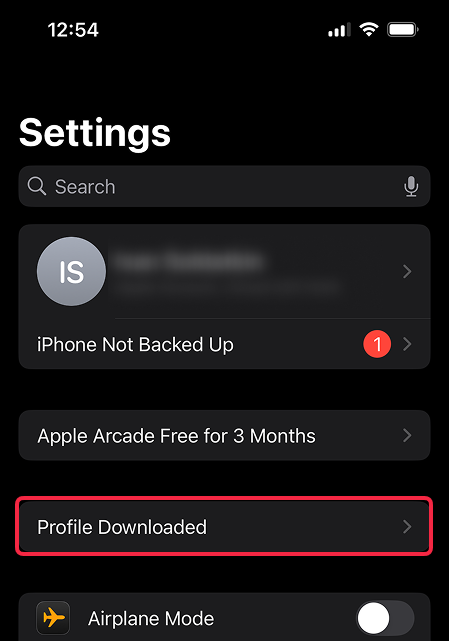
Next, visit the Settings app and press the new Profile Downloaded button below your name/account profile picture.
-
In the pop up window press Install in the top right, enter your passcode and press Install again during the warning.
ⓘ About the iOS warning you'll see iOS will warn you that the profile can "filter, monitor, and route" your traffic. This is a standard warning shown for any DNS profile. Our service only routes streaming requests — we don't see or store your browsing data.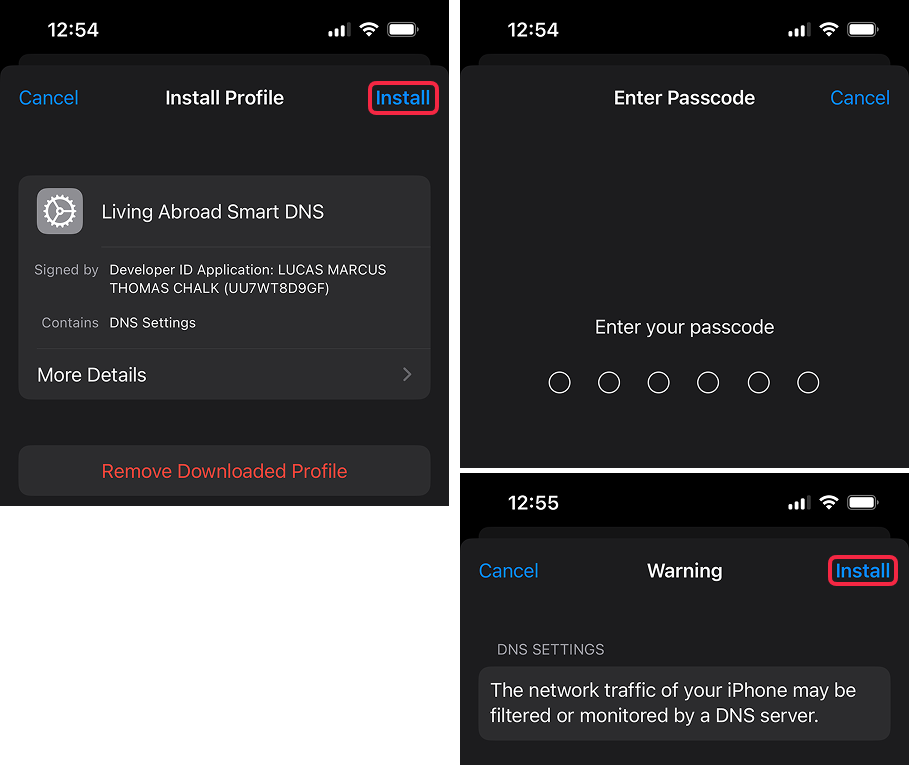
-
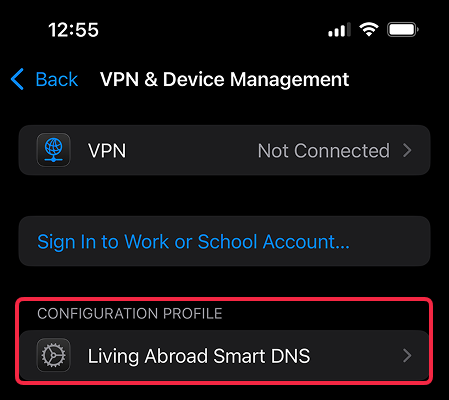
That's it! You can confirm you are set-up correctly by checking Settings > General > VPN & Device Management.
If you have followed the steps correctly, you should see Living Abroad Smart DNS appear under the "Restrictions and proxies" section on the page like below.
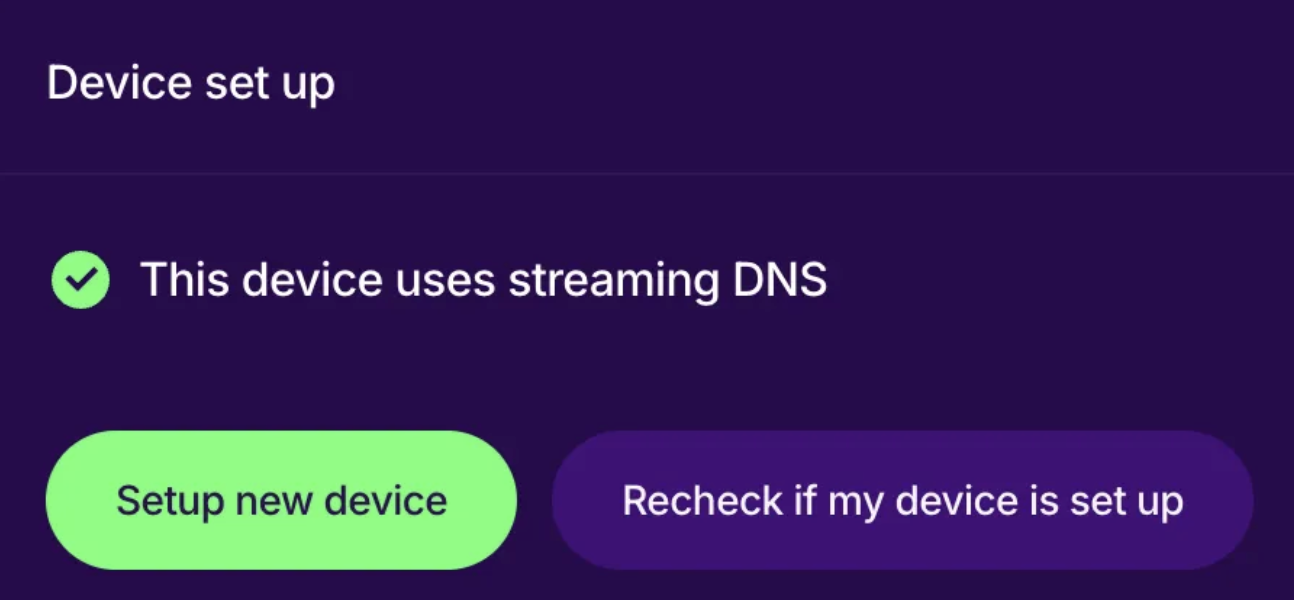
- Done! Open your account page to verify Smart DNS is active.
You can always change your DNS back to default settings by simply selecting the profile highlighted above (found in Settings > General > VPN & Device Management) and then switching it back to Automatic instead of "Living Abroad Smart DNS".
Method 2: Manual setup
-
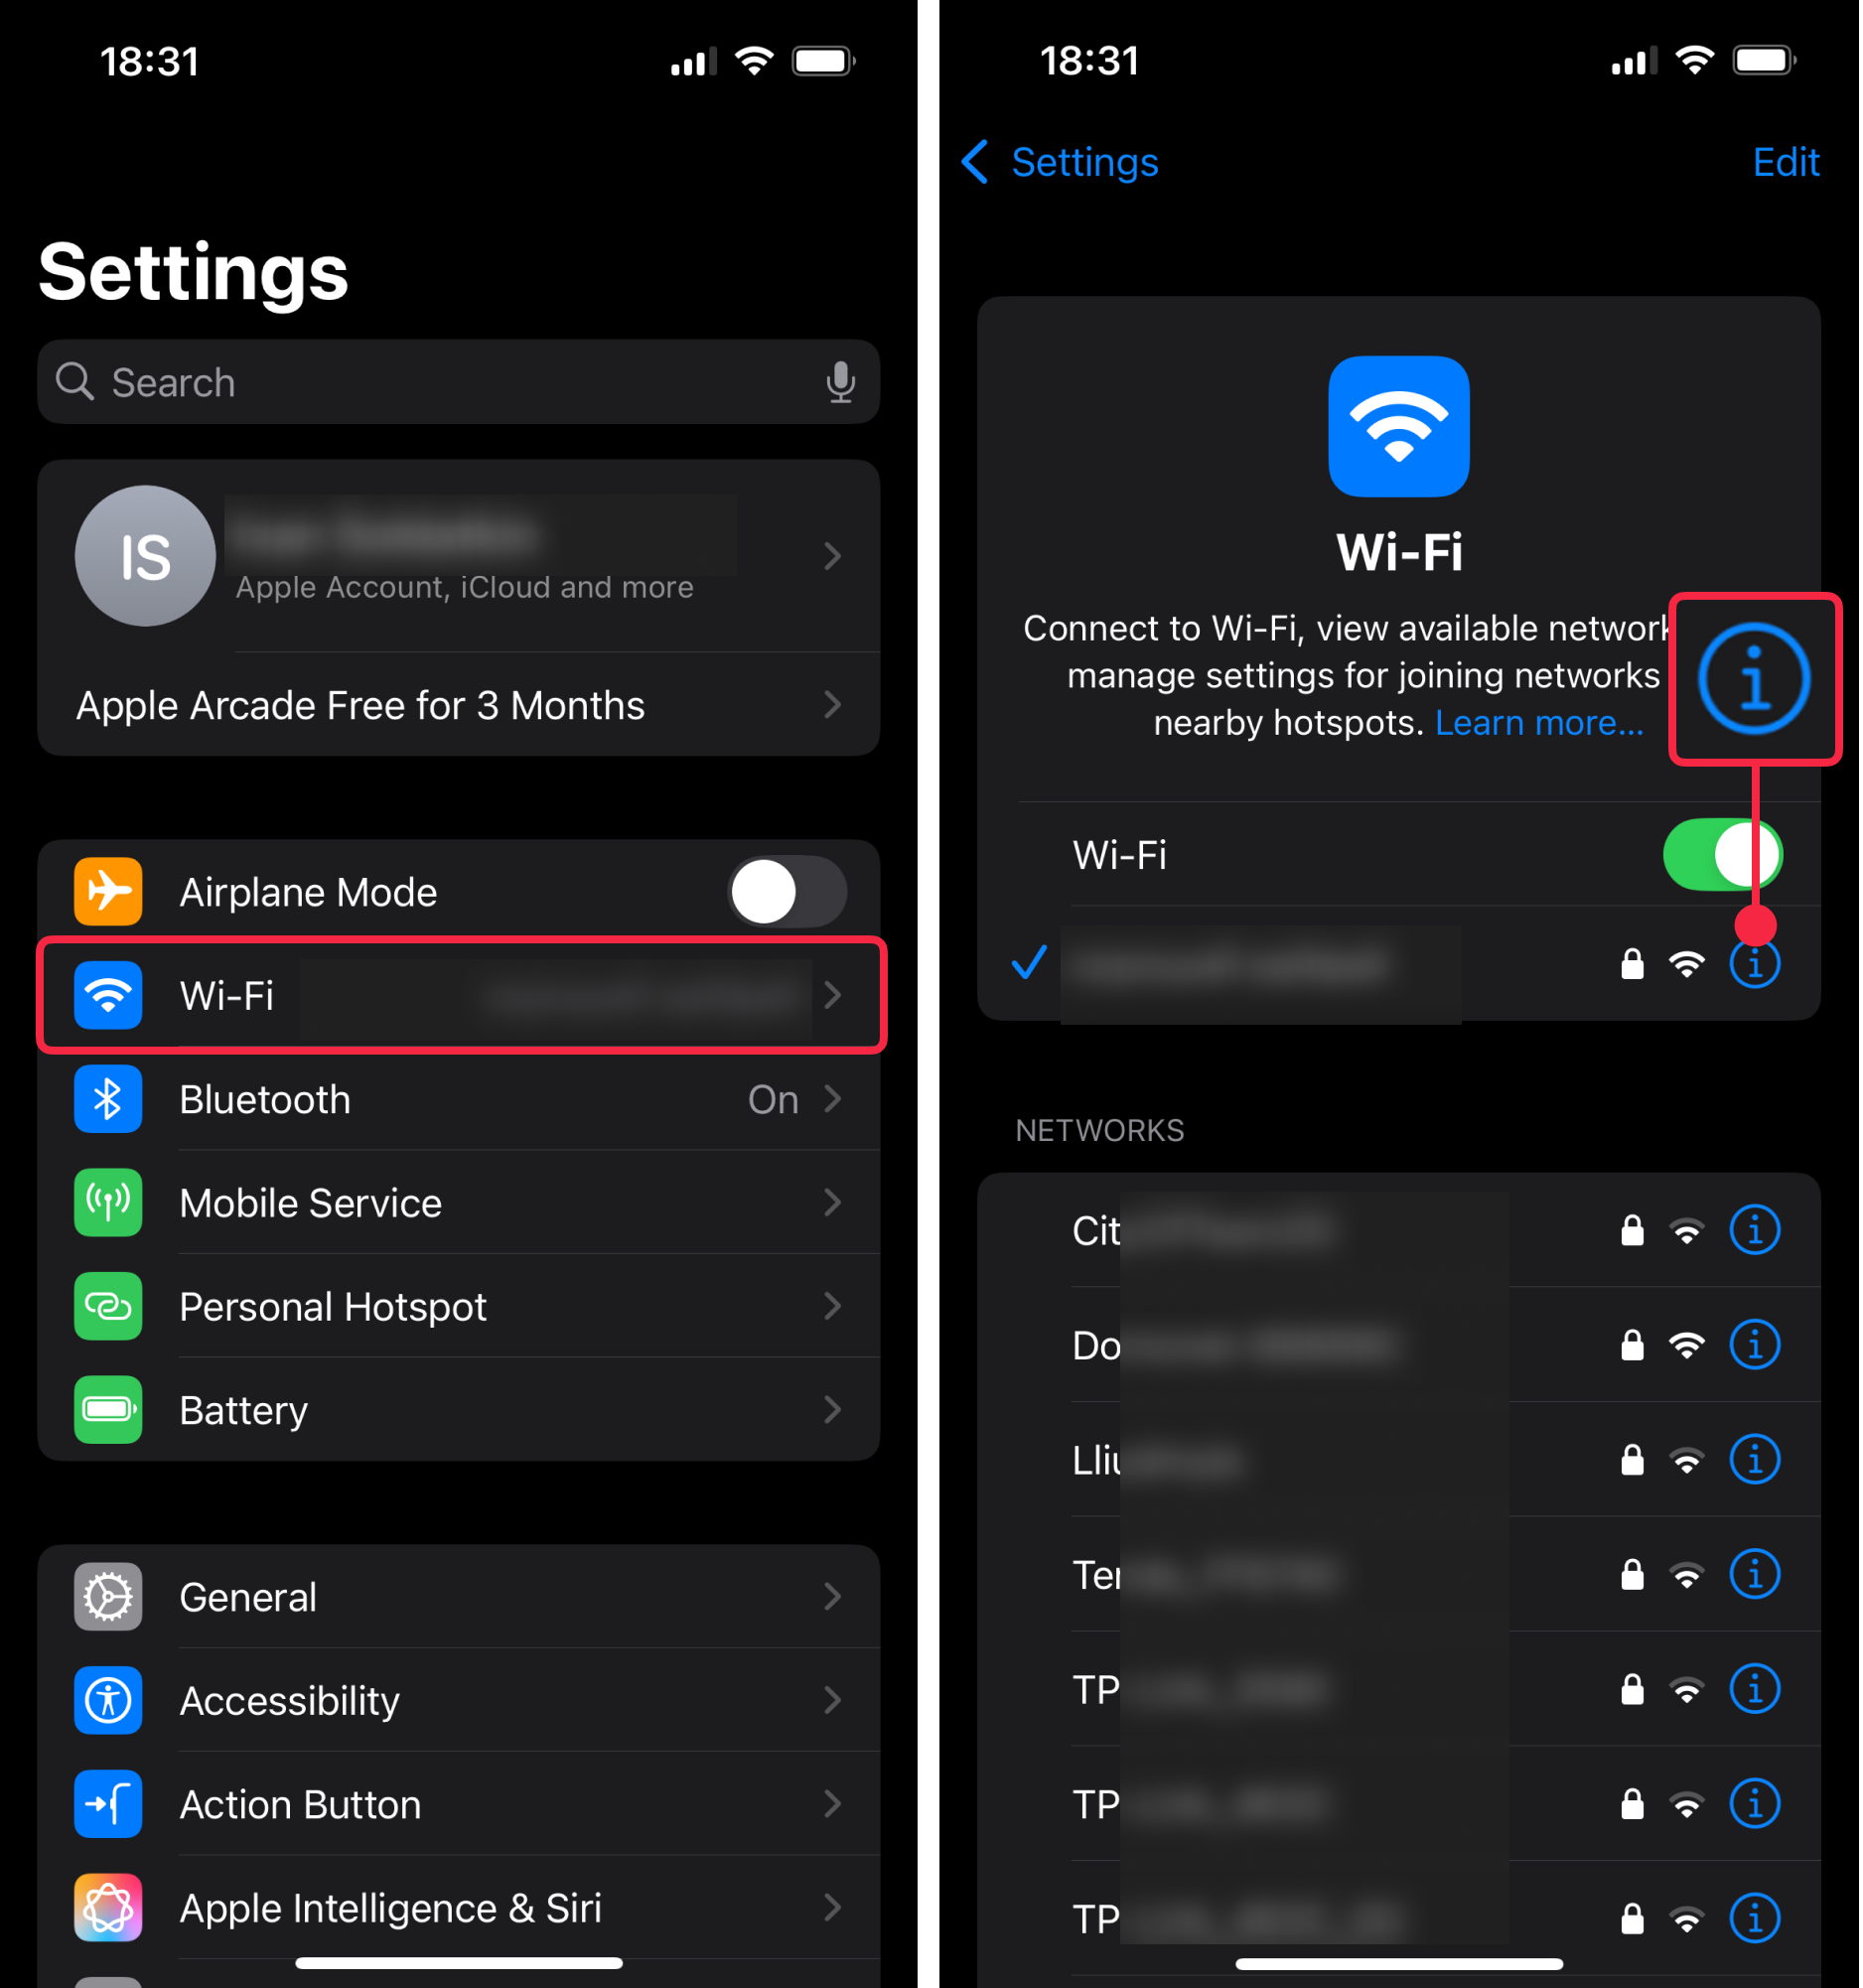
Open Settings.
-
Tap Wi-Fi.
-
Tap the ⓘ (info) button next to your active Wi-Fi network.
-
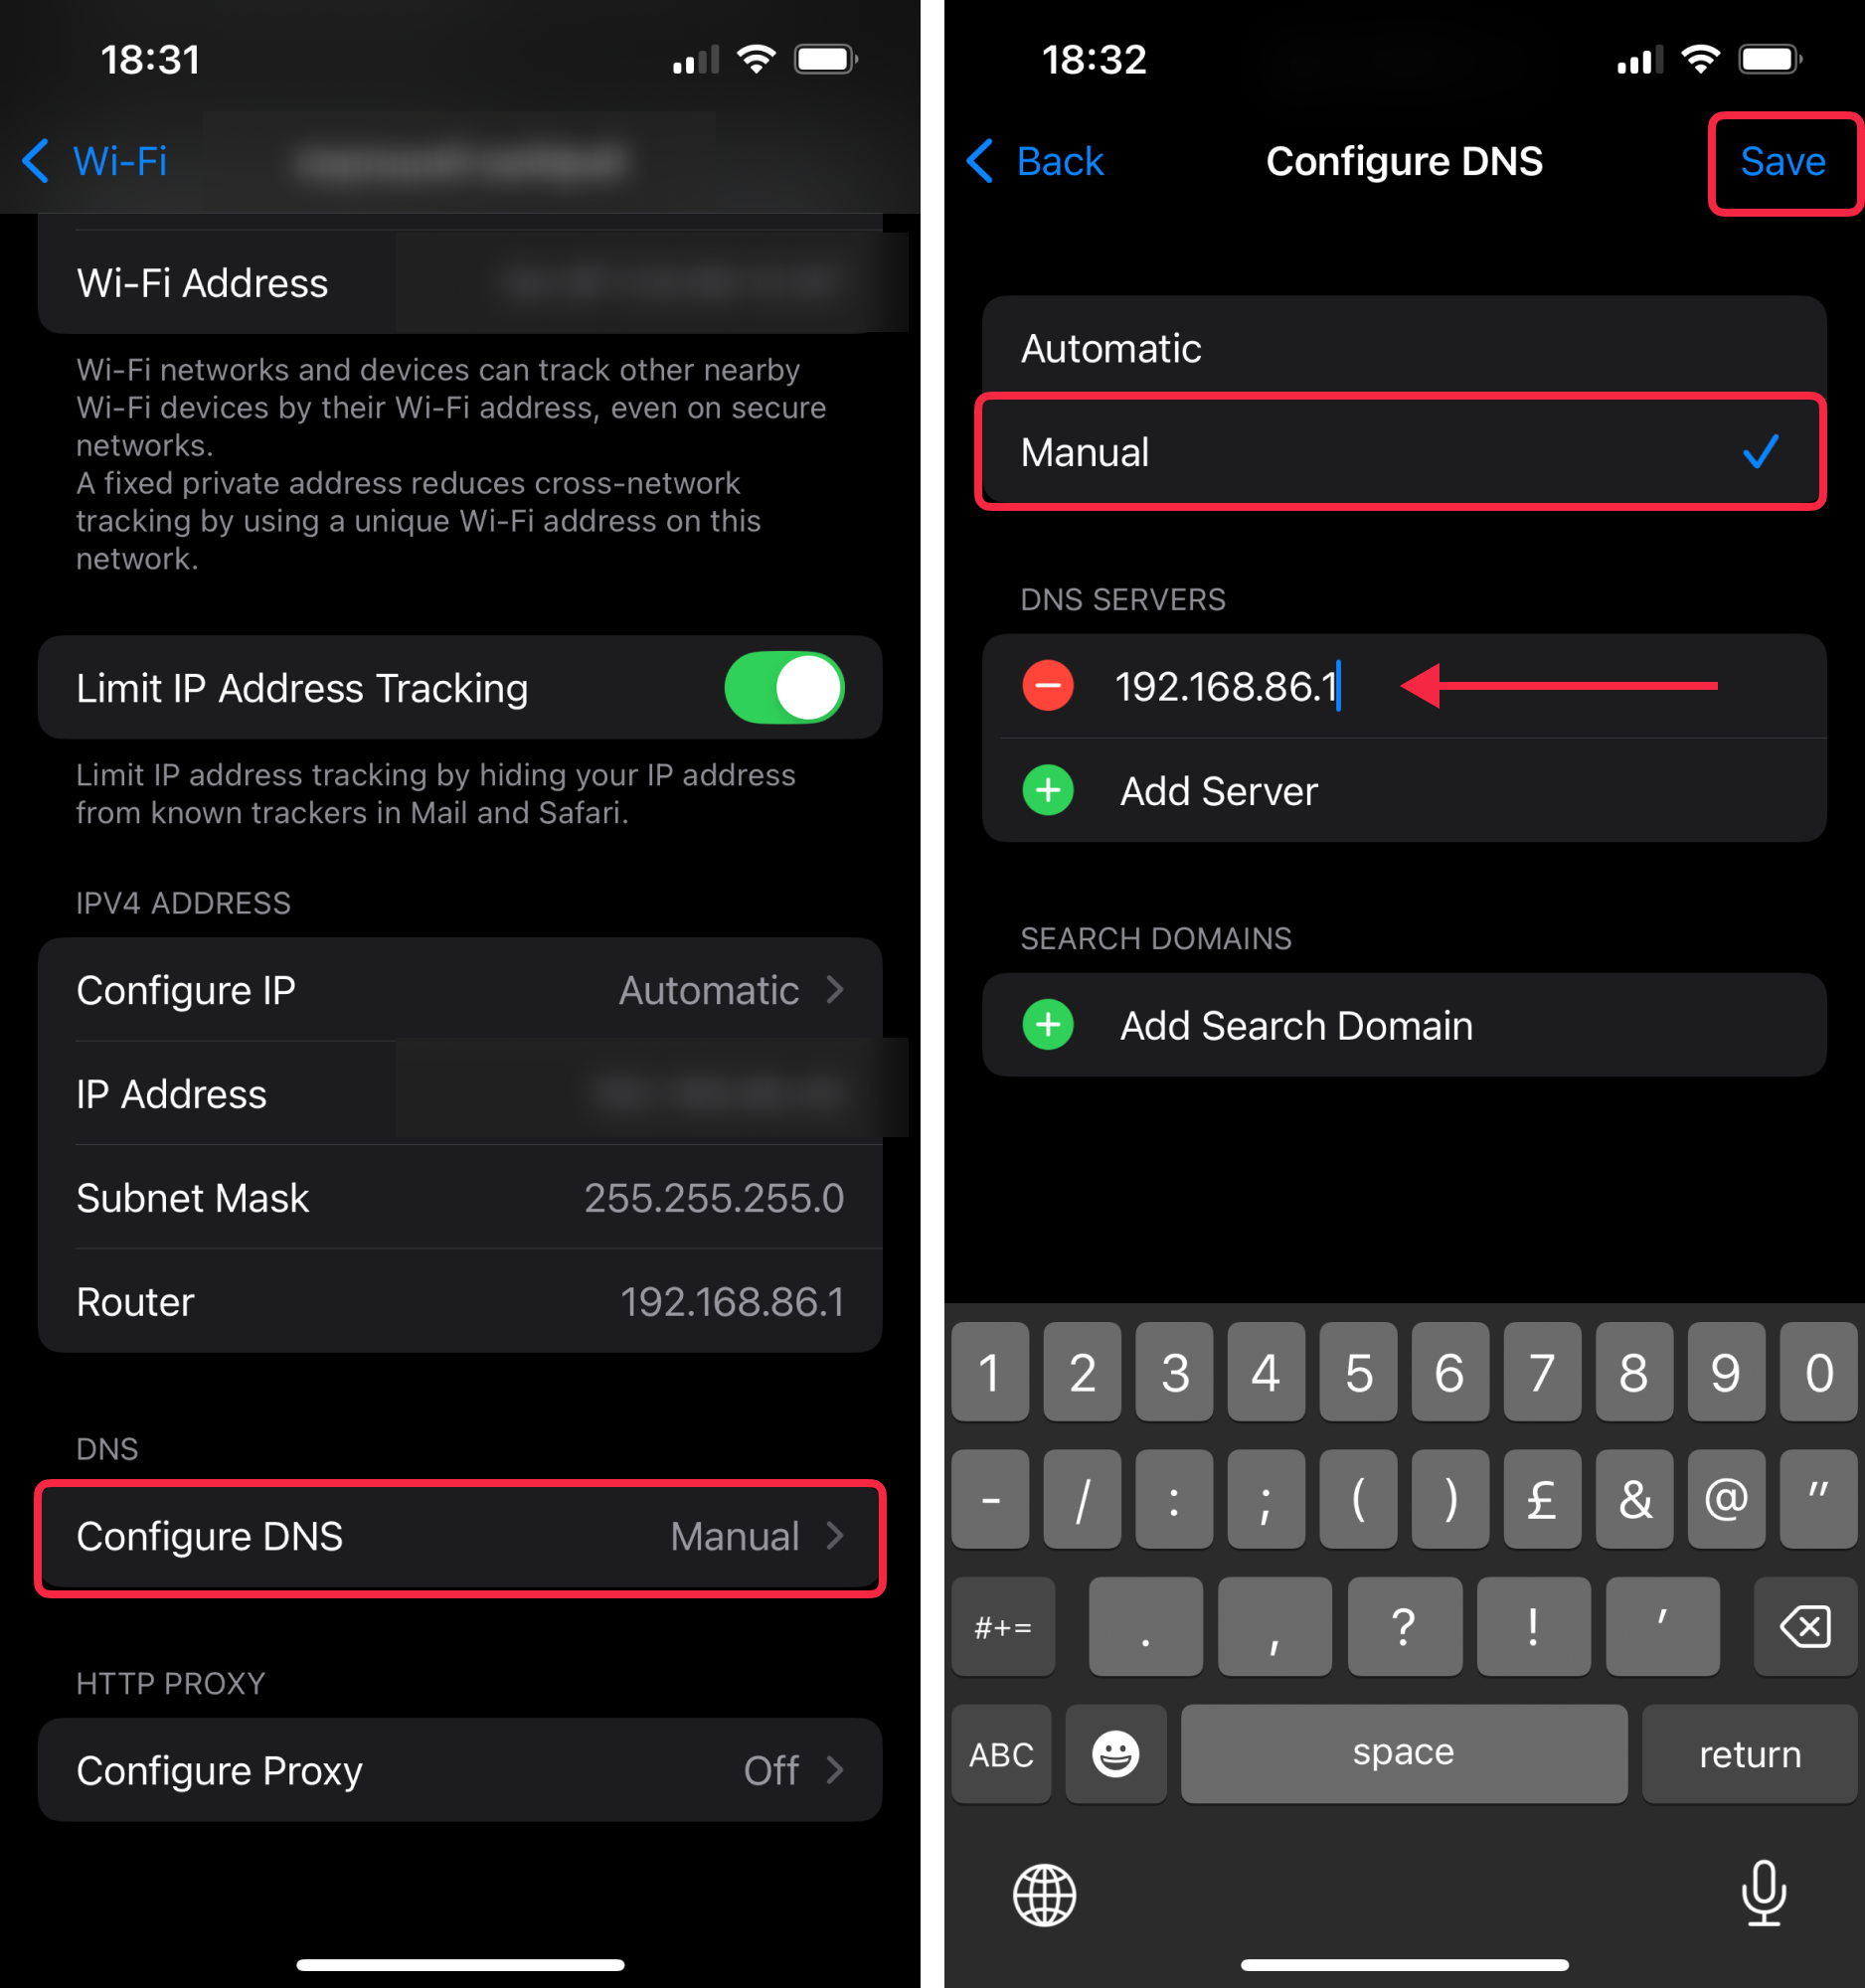
Scroll down and tap Configure DNS.
-
Change Automatic → Manual.
-
Under DNS Servers:
a. Tap the – (minus) button next to each existing server and tap Delete until the list is empty.
b. Tap + Add Server and enter:146.59.198.179
-
Tap Save in the top-right corner.
- Done! Open your account page to verify Smart DNS is active.
If you've followed all the steps of either of these guides thoroughly and aren't getting a green checkmark on your account page please refer this troubleshooting guide.